Analytics with Tumbling Windows
In this module, you’ll use the tumbling window feature of AWS Lambda to aggregate sensor data from a unicorn in the fleet in real-time. The Lambda function will read from the Amazon Kinesis stream, calculate the total distance traveled per minute for a specific unicorn, and store the results in an Amazon DynamoDB table.
Tumbling windows are distinct time windows that open and close at regular intervals. By default, Lambda invocations are stateless—you cannot use them for processing data across multiple continuous invocations without an external database. However, with tumbling windows, you can maintain your state across invocations. This state contains the aggregate result of the messages previously processed for the current window. Your state can be a maximum of 1 MB per shard. If it exceeds that size, Lambda terminates the window early. Each record of a stream belongs to a specific window. A record is processed only once, when Lambda processes the window that the record belongs to. In each window, you can perform calculations, such as a sum or average, at the partition key level within a shard.
Resources
- Create a DynamoDB table
- Create an IAM Role
- Create a Lambda function
- Monitor the Lambda function
- Query the DynamoDB table
Implementation
1. Create a DynamoDB table
Use the Amazon DynamoDB console to create a new DynamoDB table. Call your table UnicornAggregation and give it a Partition key called name of type String and a Sort key called windowStart of type String. Use the defaults for all other settings.
✅ Step-by-step Instructions
-
Go to the AWS Management Console, choose Services then select DynamoDB under Database.
-
Click Create table.
-
Enter
UnicornAggregationfor the Table name. -
Enter
namefor the Partition key and select String for the key type. -
Enter
windowStartfor the Sort key and select String for the key type. -
Leave the Default settings box checked and choose Create table.

2. Create an IAM Role for the Lambda function
Use the IAM console to create a new role. Name it unicorn-aggregation-role and select Lambda for the role type. Attach the managed policy called AWSLambdaKinesisExecutionRole to this role in order to grant permissions for your function to read from Amazon Kinesis streams and to log to Amazon CloudWatch Logs. Create a policy that allows dynamodb:PutItem access to the DynamoDB table created in the last section and attach it to the new role.
✅ Step-by-step Instructions
-
From the AWS Console, click on Services and then select IAM in the Security, Identity & Compliance section.
-
Select Policies from the left navigation and then click Create Policy.
-
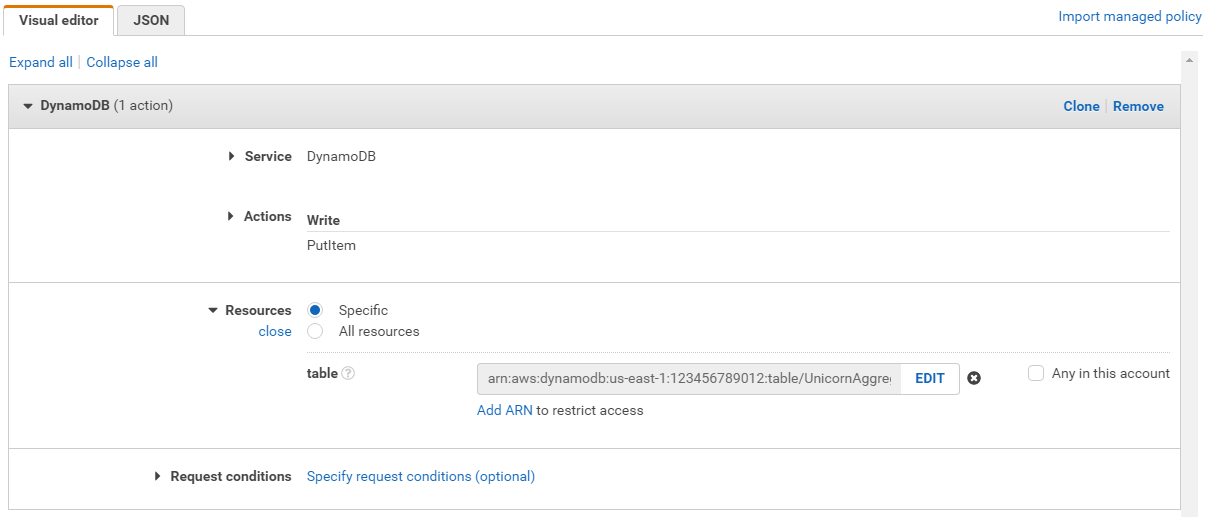
Using the Visual editor, we’re going to create an IAM policy to allow our Lambda function access to the DynamoDB table created in the last section. To begin, click Service, begin typing DynamoDB in Find a service, and click DynamoDB.
-
Type PutItem in Filter actions, and tick the PutItem checkbox.
-
Click Resources, click Add ARN in table, and construct the ARN of the DynamoDB table you created in the previous section by specifying the Region, Account, and Table Name.
 In **Region**, enter the AWS Region in which you created the DynamoDB table
 in the previous section, e.g.: us-east-1.

 In **Account**, enter your AWS Account ID which is a twelve digit number,
 e.g.: 123456789012. To find your AWS account ID number in the AWS Management
 Console, click on **Support** in the navigation bar in the upper-right, and
 then click **Support Center**. Your currently signed in account ID appears in
 the upper-right corner below the Support menu.

 In **Table Name**, enter `UnicornAggregation`.

 You should see your ARN in the **Specify ARN for table** field and it should look similar to: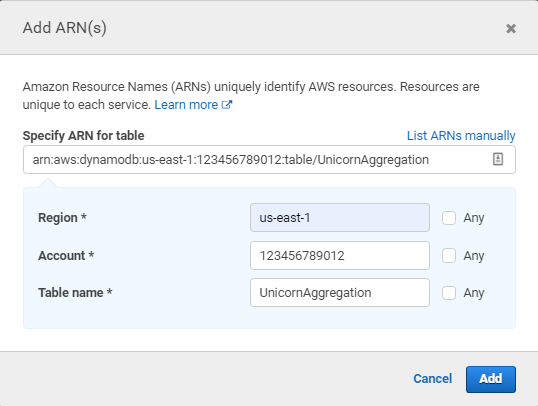
-
Click Add.
-
Click Next: Tags.
-
Click Next: Review.
-
Enter
unicorn-aggregation-ddb-write-policyin the Name field. -
Click Create policy.
-
Select Roles from the left navigation and then click Create role.
-
Click Lambda for the role type from the AWS service section.
-
Click Next: Permissions.
-
Begin typing
AWSLambdaKinesisExecutionRolein the Filter text box and check the box next to that role. -
Begin typing
unicorn-aggregation-ddb-write-policyin the Filter text box and check the box next to that role. -
Click Next.
-
Enter
unicorn-aggregation-rolefor the Role name. -
Click Create role.
-
Begin typing
unicorn-aggregation-rolein the Search text box.
-
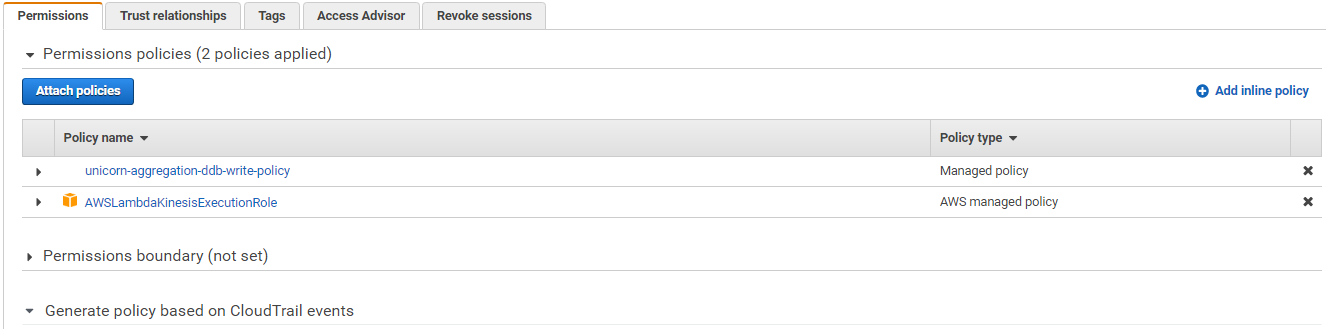
Click on unicorn-aggregation-role and it should look similar to:
3. Create a Lambda function
Use the Lambda console to create a Lambda function called WildRydesAggregator that will be triggered whenever a new record is available in the wildrydes stream. Use the provided index.js implementation for your function code. Create an environment variable with the key TABLE_NAME and the value UnicornAggregation. Configure the function to use the unicorn-aggregation-role role created in the previous sections.
-
Go to the AWS Management Console, choose Services then select Lambda under Compute.
-
Click the three lines icon to expand the service menu.
-
Click Functions.
-
Click Create function.
-
Enter
WildRydesAggregatorin the Function name field. -
Select Node.js 14.x from Runtime.
-
Select unicorn-aggregation-role from the Existing role dropdown.

-
Click Create function.
-
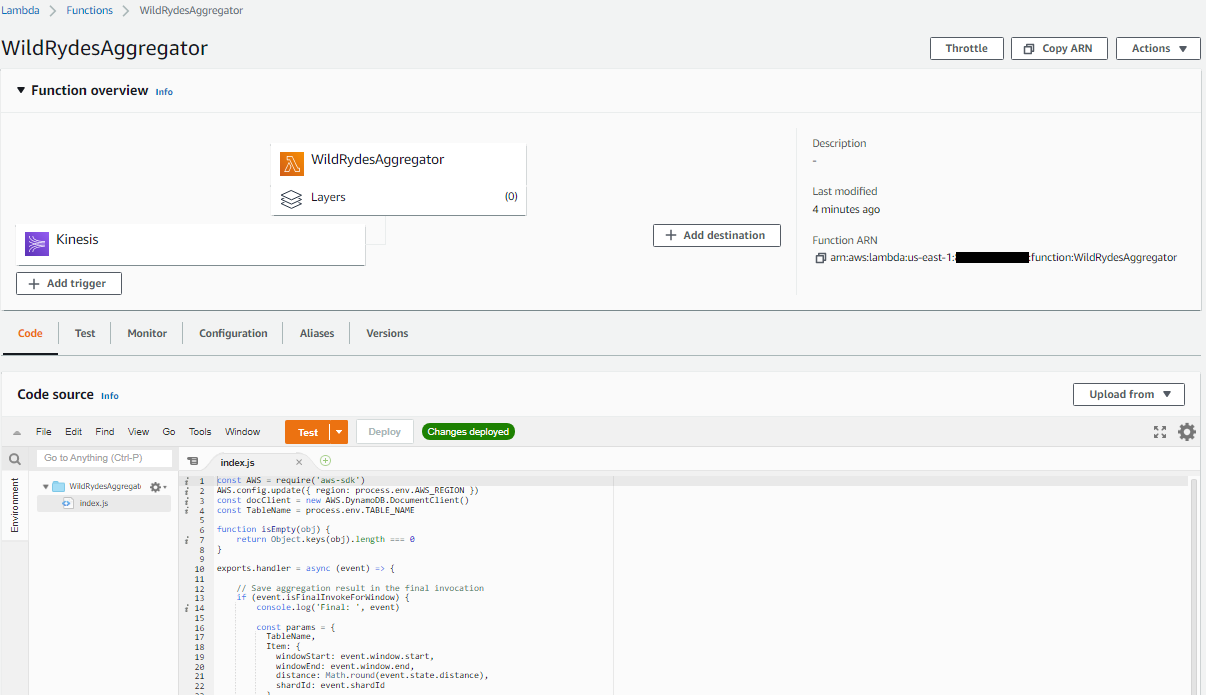
Scroll down to the Code source section.
-
Double click the index.js file to open it in the editor.
-
Copy and paste the JavaScript code below into the code editor, replacing all of the existing code:
const AWS = require("aws-sdk"); AWS.config.update({ region: process.env.AWS_REGION }); const docClient = new AWS.DynamoDB.DocumentClient(); const TableName = process.env.TABLE_NAME; function isEmpty(obj) { return Object.keys(obj).length === 0; } exports.handler = async (event) => { // Save aggregation result in the final invocation if (event.isFinalInvokeForWindow) { console.log("Final: ", event); const params = { TableName, Item: { windowStart: event.window.start, windowEnd: event.window.end, distance: Math.round(event.state.distance), shardId: event.shardId, name: event.state.name, }, }; console.log({ params }); await docClient.put(params).promise(); } console.log(JSON.stringify(event, null, 2)); // Create the state object on first invocation or use state passed in let state = event.state; if (isEmpty(state)) { state = { distance: 0, }; } console.log("Existing: ", state); // Process records with custom aggregation logic event.Records.map((record) => { const payload = Buffer.from(record.kinesis.data, "base64").toString( "ascii" ); const item = JSON.parse(payload); let value = item.Distance; console.log("Adding: ", value); state.distance += value; let unicorn = item.Name; console.log("Name: ", unicorn); state.name = unicorn; }); // Return the state for the next invocation console.log("Returning state: ", state); return { state: state }; }; -
In the Configuration tab, select the Environment variables section.
-
Click Edit and then Add environment variable.
-
Enter
TABLE_NAMEin Key andUnicornAggregationin Value and click Save.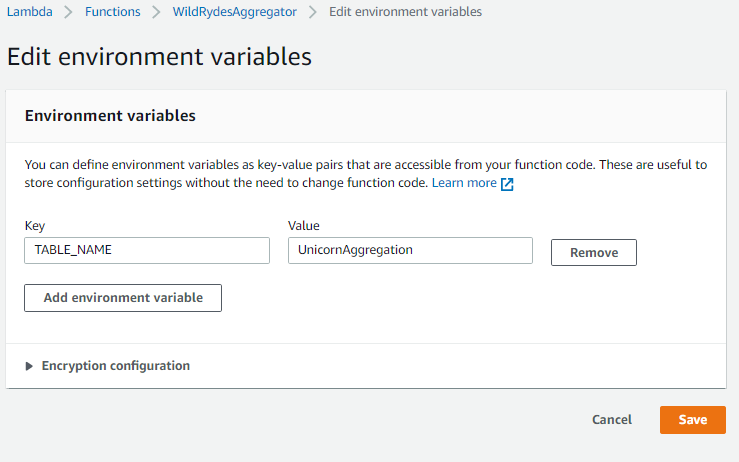
-
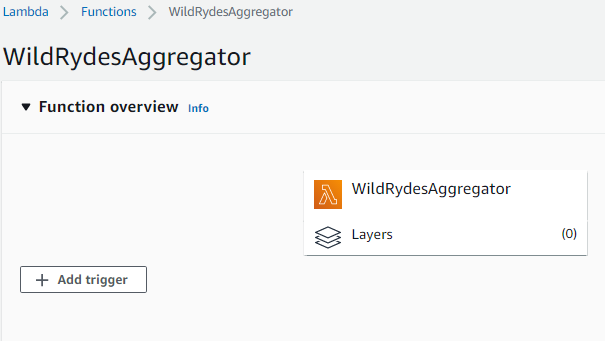
Scroll up and click on Add trigger from the Function overview section.
-
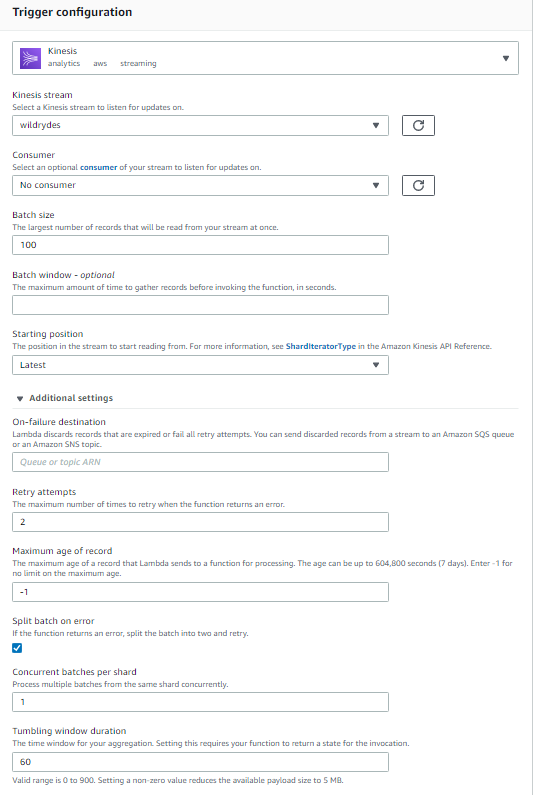
In the Trigger configuration section, select Kinesis.
-
Under Kinesis stream, select wildrydes.
-
Leave Batch size set to 100 and Starting position set to Latest.
-
Open the Additional settings section.
-
It is a best practice to set the retry attempts and bisect on batch settings when setting up your trigger. Change Retry attempts to 2 and select the checkbox for Split batch on error.
-
For Tumbling window duration, enter 60. This sets the time interval for your aggregation in seconds.
-
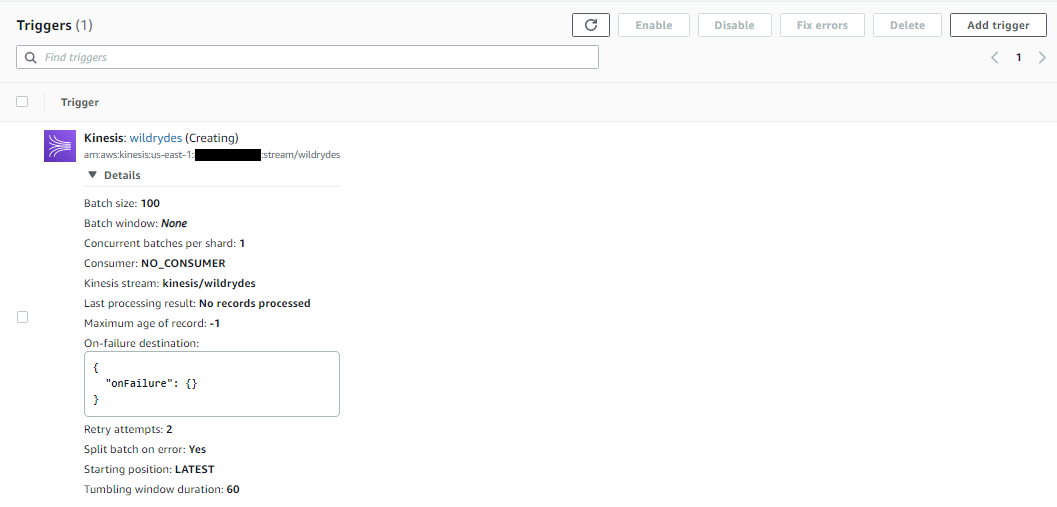
Click Add and the trigger will start creating.
-
Click the refresh button until creation is complete and the trigger shows as Enabled.
-
Go back to the Code tab and Deploy the Lambda function. You will see a confirmation that the changes were deployed.
4. Monitor the Lambda function
Verify that the trigger is properly executing the Lambda function and inspect the output from the Lambda function.
✅ Step-by-step Instructions
-
Return to your Cloud9 environment, and run the producer to start emitting sensor data to the stream.
./producer -
Click on the Monitor tab. Next, click on View logs in CloudWatch to explore the logs in CloudWatch for the log group /aws/lambda/WildRydesAggregator.
-
Select the most recent Log stream.
-
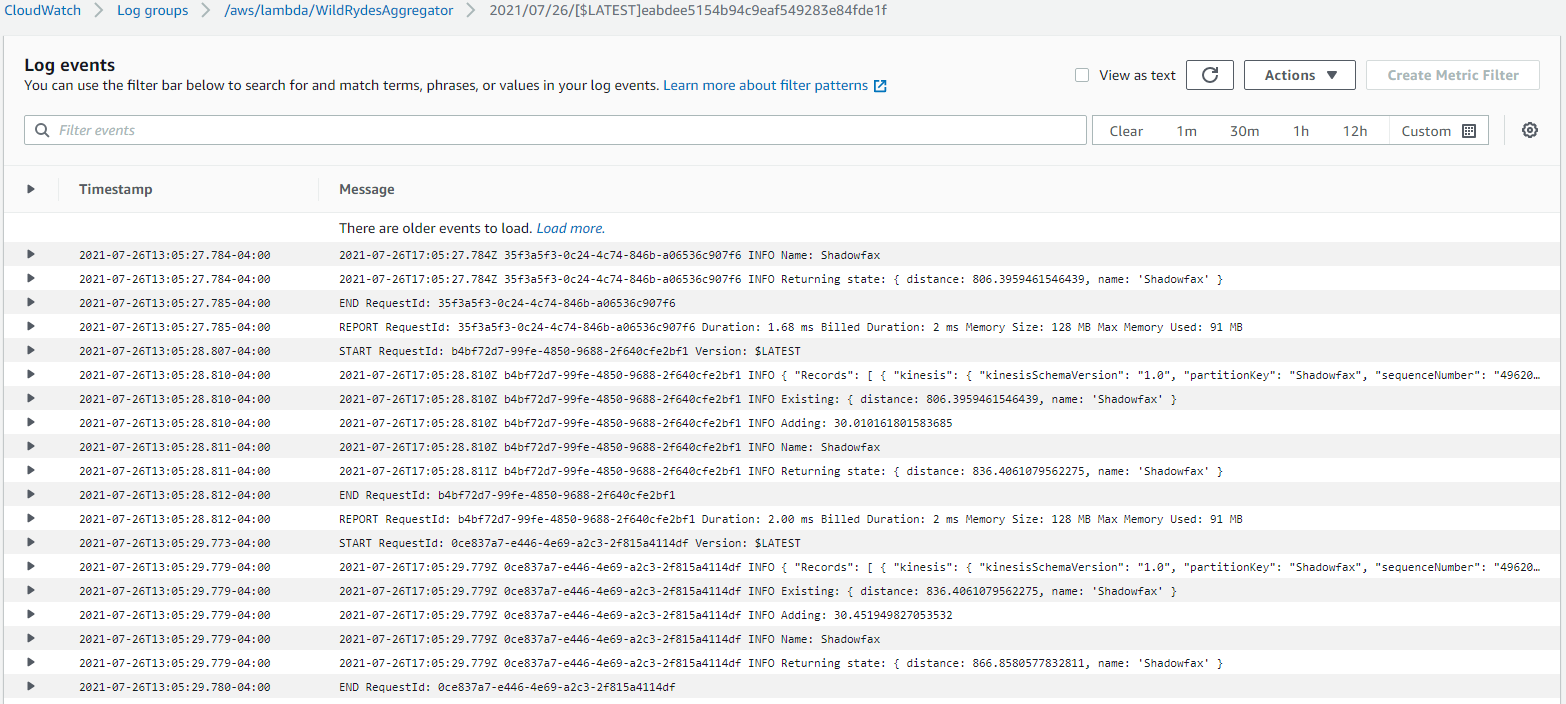
You can use the Filter events bar at the top to quickly search for matching values within your logs. Use the filter bar, or scroll down, to examine the log events showing the Existing: distance state, Adding: a new distance count, and the Returning state: after the Lambda function is invoked.

-
Because we set the tumbling window to 60 seconds, every minute the Final: distance state is aggregated and passed to the DynamoDB table. To see the final distance count, use the filter bar to search for
"Final:". -
After expanding this log, you will see isFinalInvokeForWindow is set to true, along with the state data that will be passed to DynamoDB.

5. Query the DynamoDB table
Using the AWS Management Console, query the DynamoDB table to verify the per-minute distance totals are aggregated for the specified unicorn.
✅ Step-by-step Instructions
-
Click on Services then select DynamoDB in the Database section.
-
Click Tables from the left-hand navigation.
-
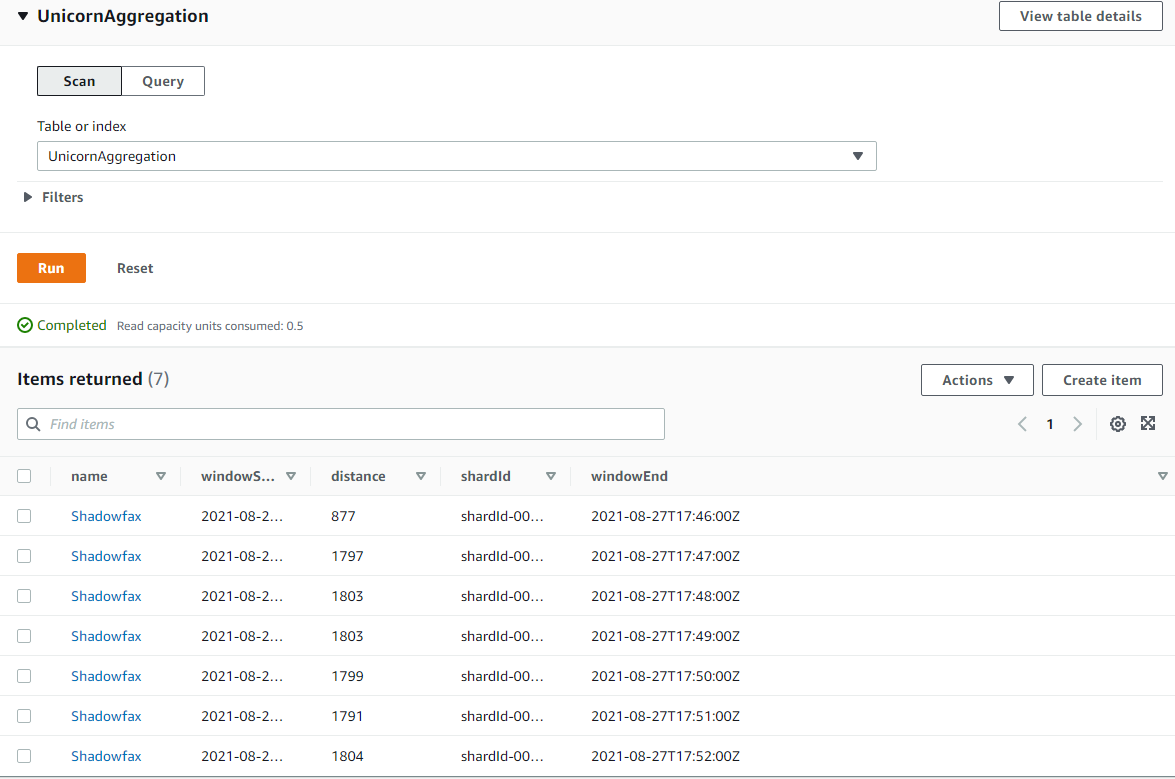
Click on UnicornAggregation.
-
Click on the View Items button on the top right.
-
Select Run to return the items in the table. Here you should see each per-minute data point for the unicorn for which you’re running a producer. Verify the state information from the CloudWatch log you viewed was successfully passed to the DynamoDB table.
⭐ Recap
🔑 The tumbling window feature allows a streaming data source to pass state between multiple Lambda invocations. During the window, a state is passed from one invocation to the next, until a final invocation at the end of the window. This allows developers to calculate aggregates in near-real time, and makes it easier to calculate sums, averages, and counts on values across multiple batches of data. This feature provides an alternative way to build analytics in addition to services like Amazon Kinesis Data Analytics.
🔧 In this module, you’ve created a Lambda function that reads from the Kinesis stream of unicorn data, aggregates the distance traveled per-minute, and saves each row to DynamoDB.
Next
✅ Congrats!! You have completed the stream processing and analytics with AWS Lambda. If you have some more time, You can try out the section in the extra credit or proceed to the Stream Aggregation