Data Lake
Data Lake
In this module, you’ll create an Amazon Kinesis Data Firehose to deliver data from the Amazon Kinesis stream created in the first module to Amazon Simple Storage Service (Amazon S3) in batches. You’ll then use Amazon Athena to run queries against our raw data in place.
Overview
The architecture for this module builds on the Amazon Kinesis stream you created in the first module. You’ll use Amazon Kinesis Data Firehose to batch the data and deliver it to Amazon S3 to archive it. Using Amazon Athena, you’ll run ad-hoc queries against the raw data in the Amazon S3 bucket.

Implementation
1. Create an Amazon S3 bucket
Use the console or CLI to create an S3 bucket. Keep in mind, your bucket’s name
must be globally unique. We recommend using a name such as
wildrydes-data-<YOUR NAME> or suffix with the AWS Account ID wildrydes-data-<ACCOUNT ID>. The account id can be obtained from the AWS console Menu at the top Right hand side pull down.

✅ Step-by-step Instructions
-
From the AWS Console click Services then select S3 under Storage.
-
Click + Create bucket
-
Provide a globally unique name for your bucket such as
wildrydes-data-<YOUR NAME>orwildrydes-data-<ACCOUNT ID> -
Select the region you’ve been using for your resources in this workshop.
-
Leave the default settings.
-
Click Next three times, and then click Create bucket.
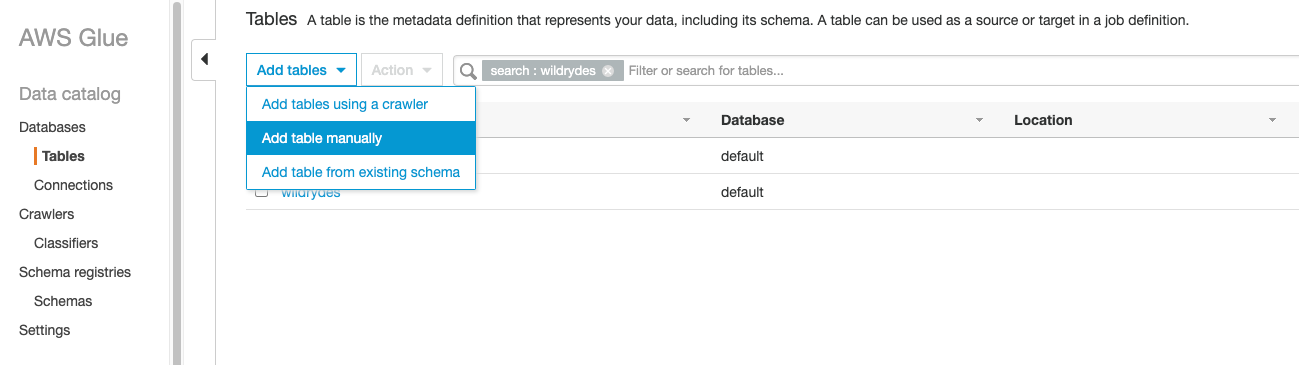
2. Create an AWS Glue table
✅ Step-by-step Instructions
-
From the AWS Console click Services then select AWS Glue under Analytics.
-
Select Add table manually
-
Specify
wildrydes_athenaas table name and choose default from the database dropdown. Click Next.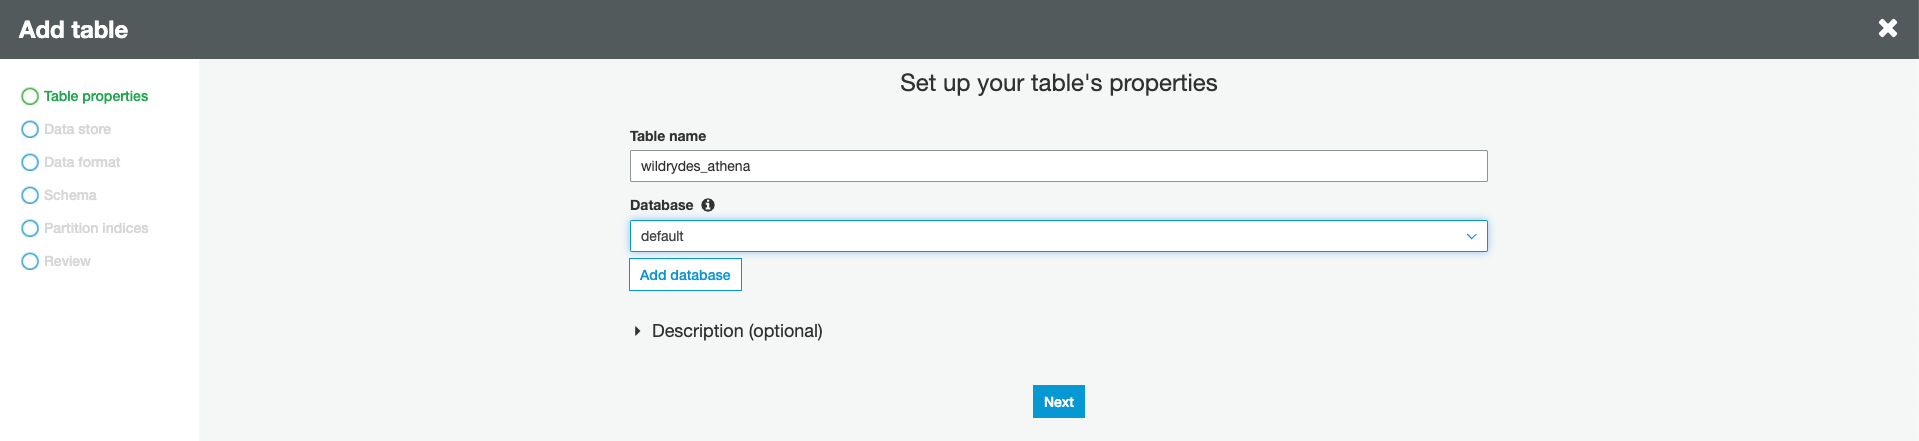
-
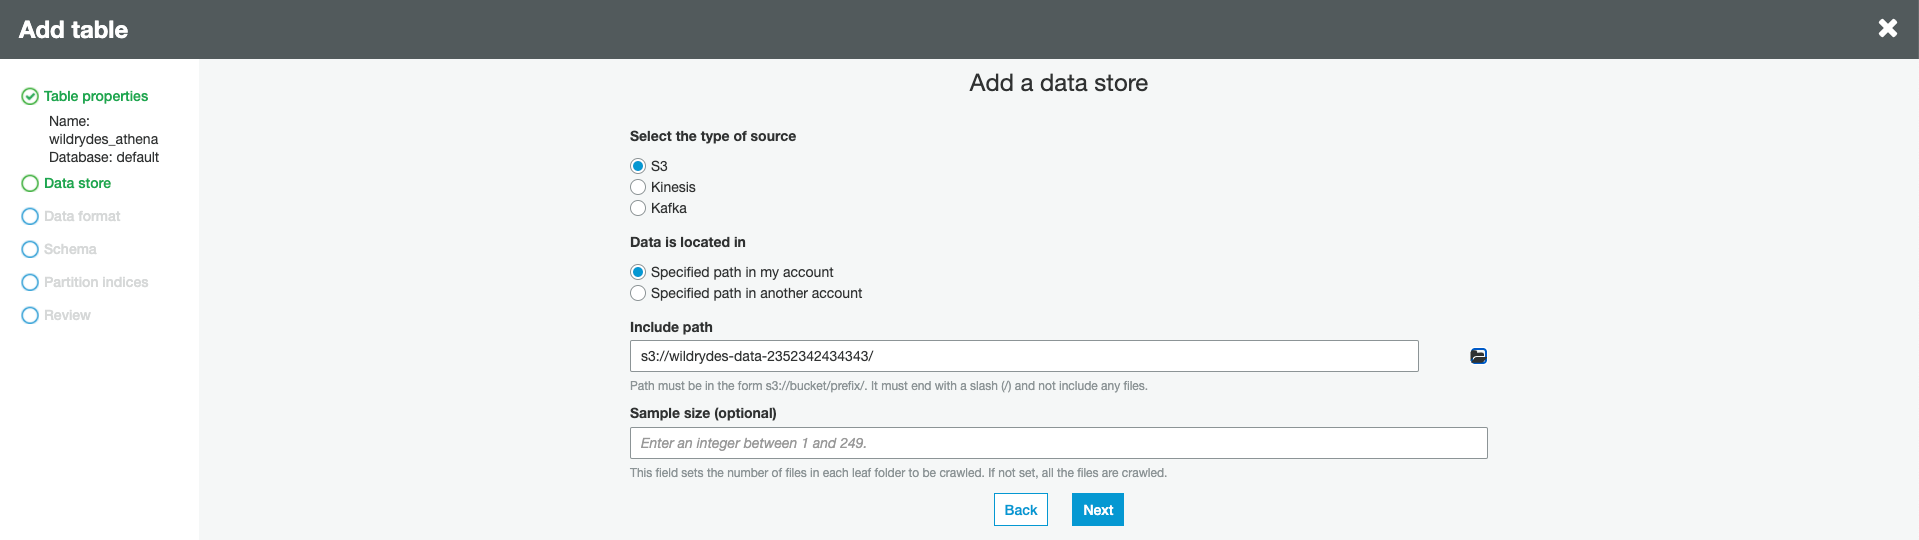
Choose S3 as source, and specify the S3 bucket name as Include path. Click Next.
-
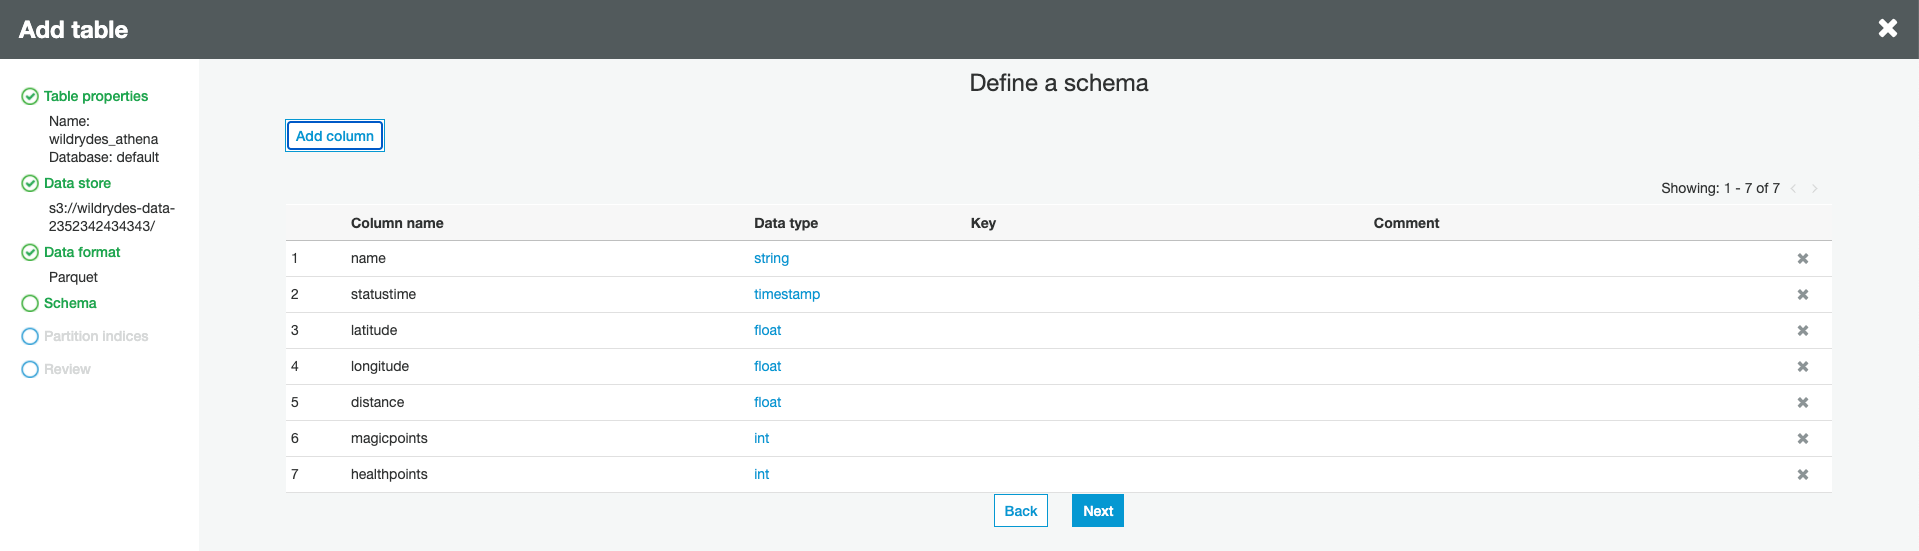
Choose Parquet as data format. Click Next.

-
Using Add Column button add the following columns. Click Next when you have added all the columns.
- name (string)
- statustime (timestamp)
- latitude (float)
- longitude (float)
- distance (float)
- magicpoints (int)
- healthpoints (int)
-
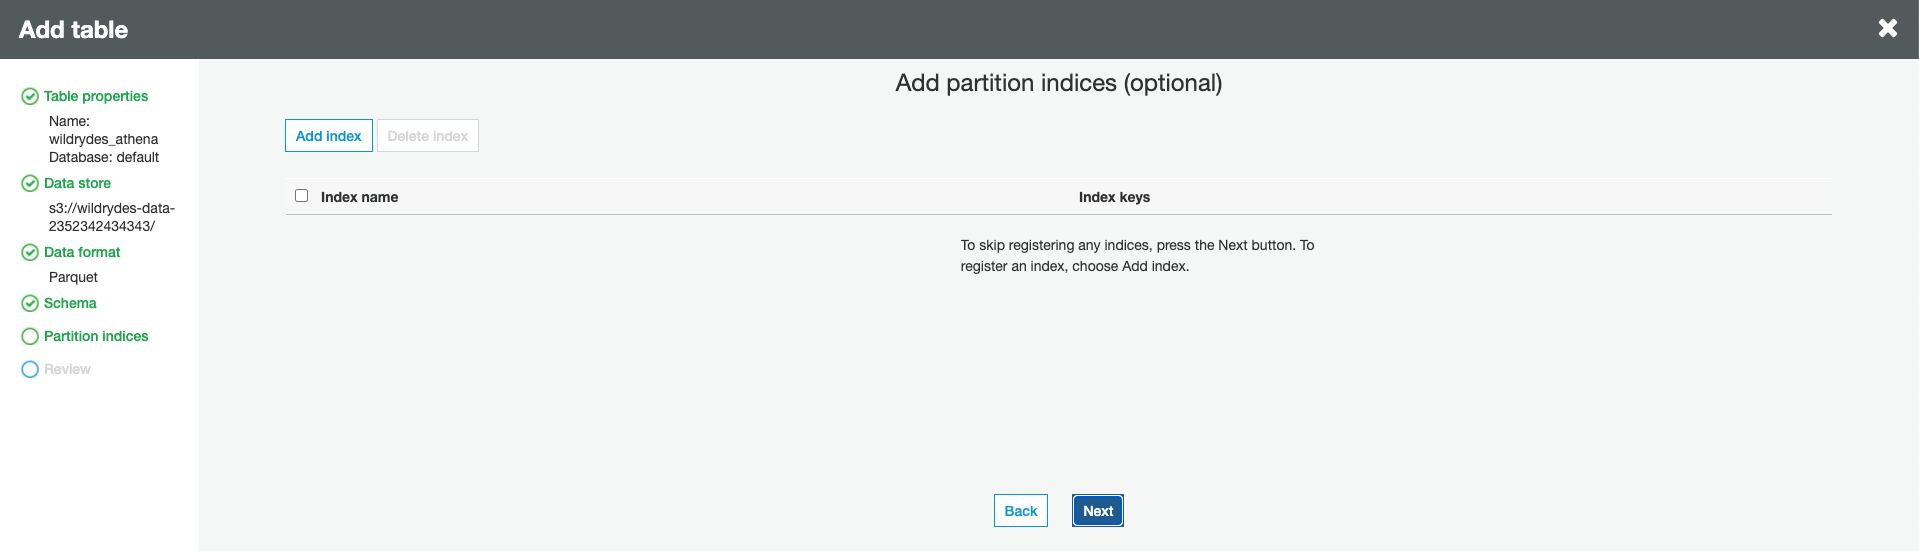
Click Next button to skip adding partition indices.
-
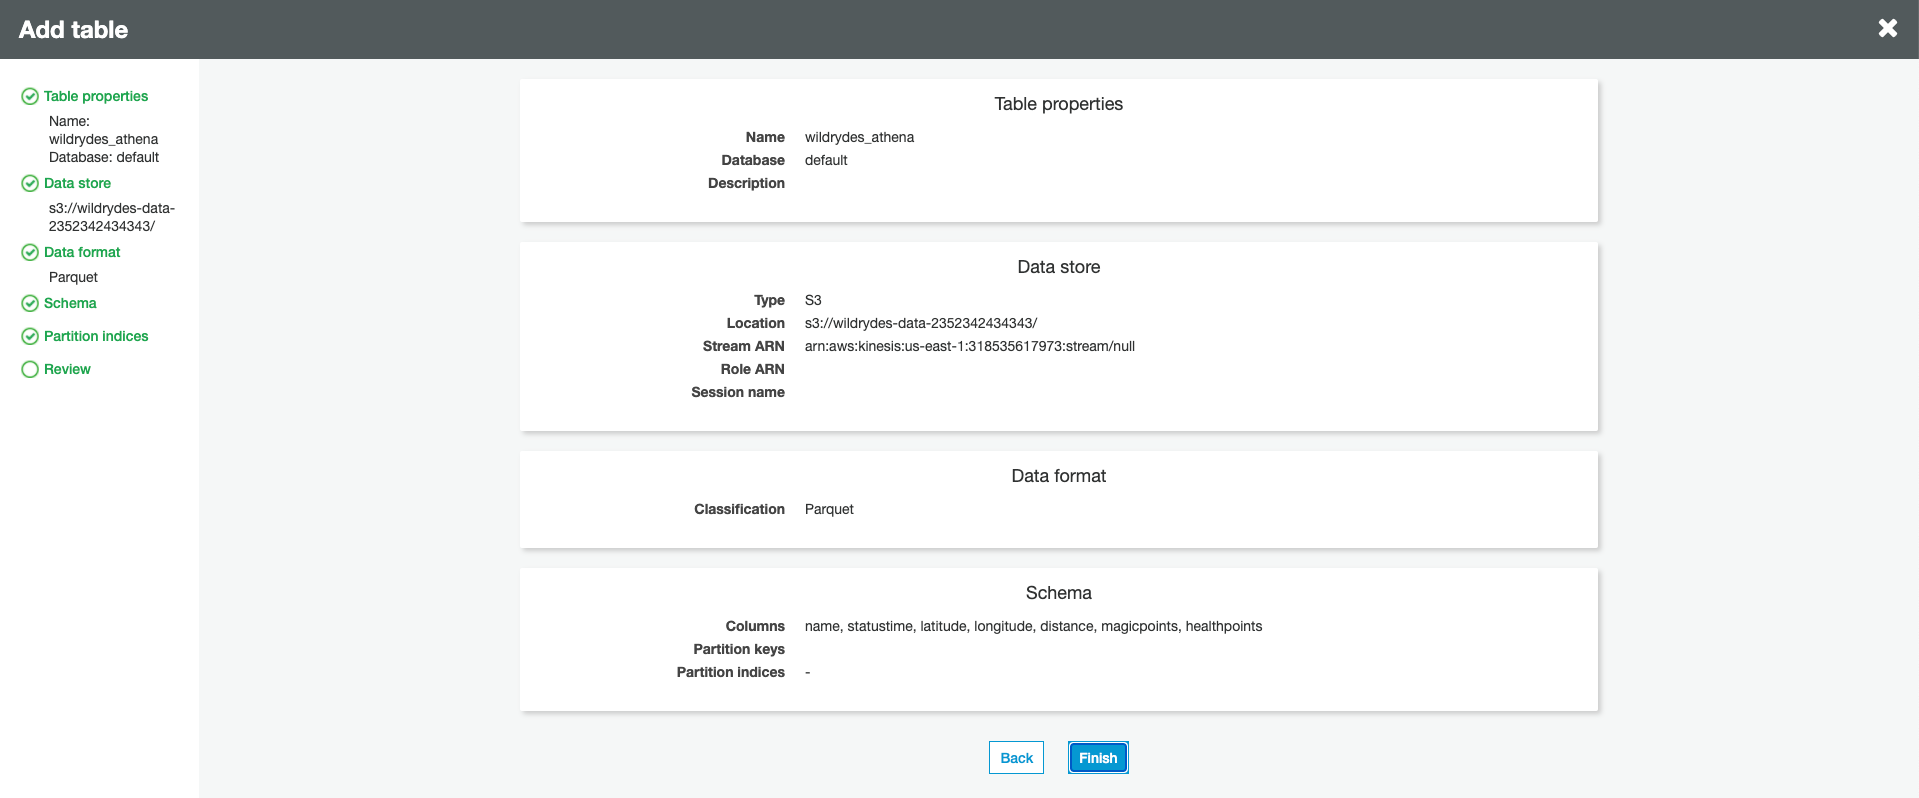
Review the table properties and click Finish button.
3. Create an Amazon Kinesis Data Firehose delivery stream
In this section you will create an Amazon Kinesis Data Firehose delivery stream named wildrydes that is configured to source data from the wildrydes stream and deliver its contents in batches to the S3 bucket created in section 1.
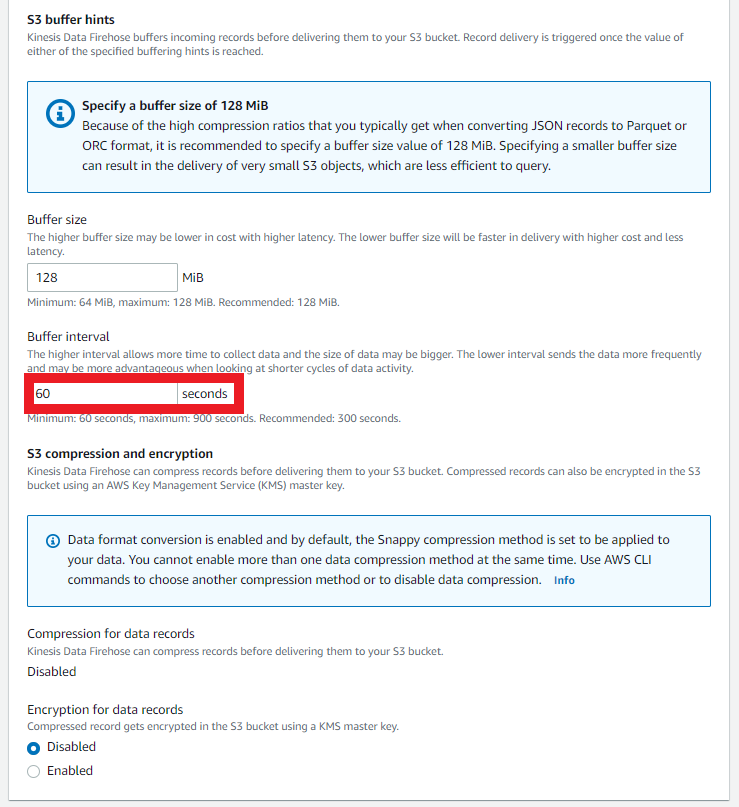
Amazon Kinesis Data Firehose buffers incoming streaming data to a certain size or for a certain period of time before delivering it to destinations. Buffer size is in MBs and ranges from 1MB to 128MB for Amazon S3 destination Buffer interval is in seconds and ranges from 60 seconds to 900 seconds. Increasing the buffers size allows us to gather data before delivering to ensure all data is delivered to the destination S3 bucket.
✅ Step-by-step Instructions
-
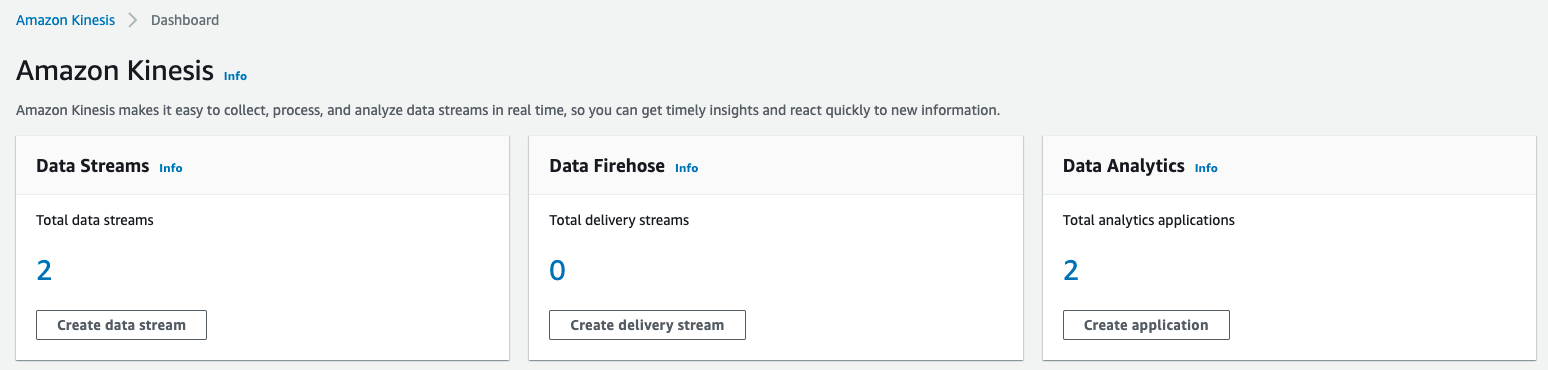
From the AWS Console click Services then select Kinesis under Analytics.
-
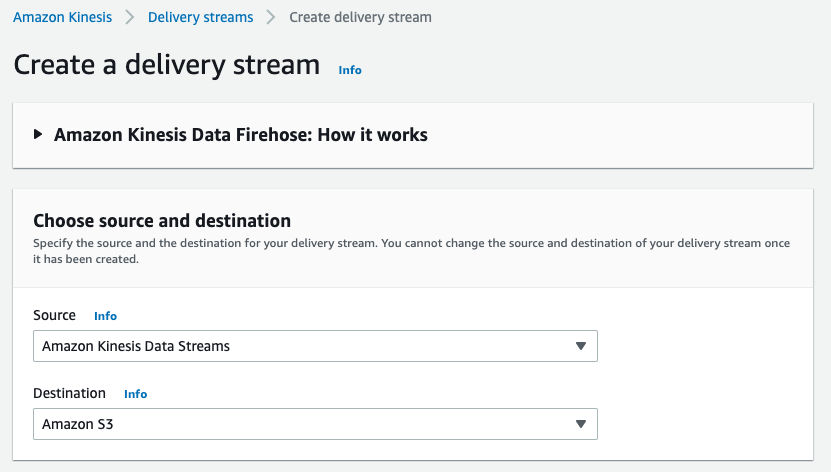
Click Create delivery stream.
-
Choose Amazon Kinesis Data Stream as a source and Amazon S3 as destination.
-
Use Browse button to select
wildrydeskinesis data stream for Source settings and specifywildrydesas Delivery stream name.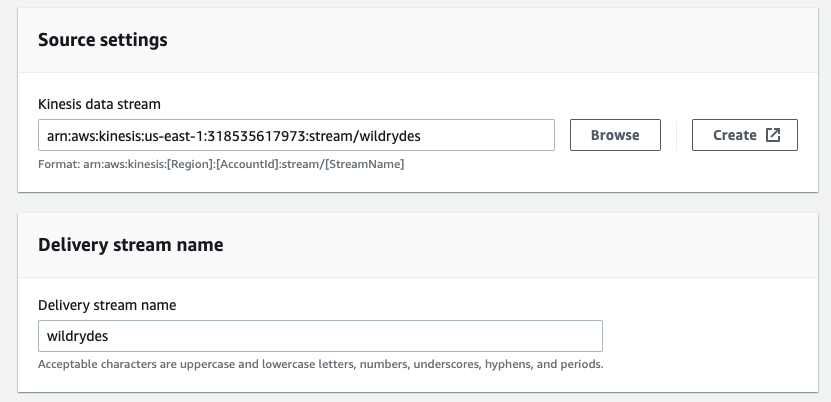
-
In Transform and convert records section Enable record format conversion, choose Apache Parquet as a format and select
wildrydes_athenatable you have created earlier in this module.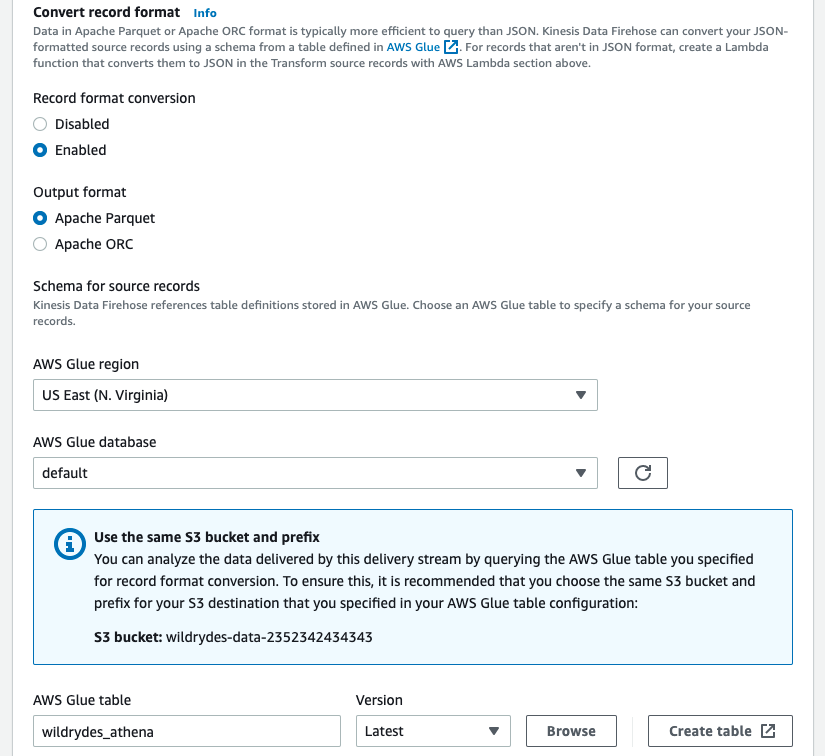
-
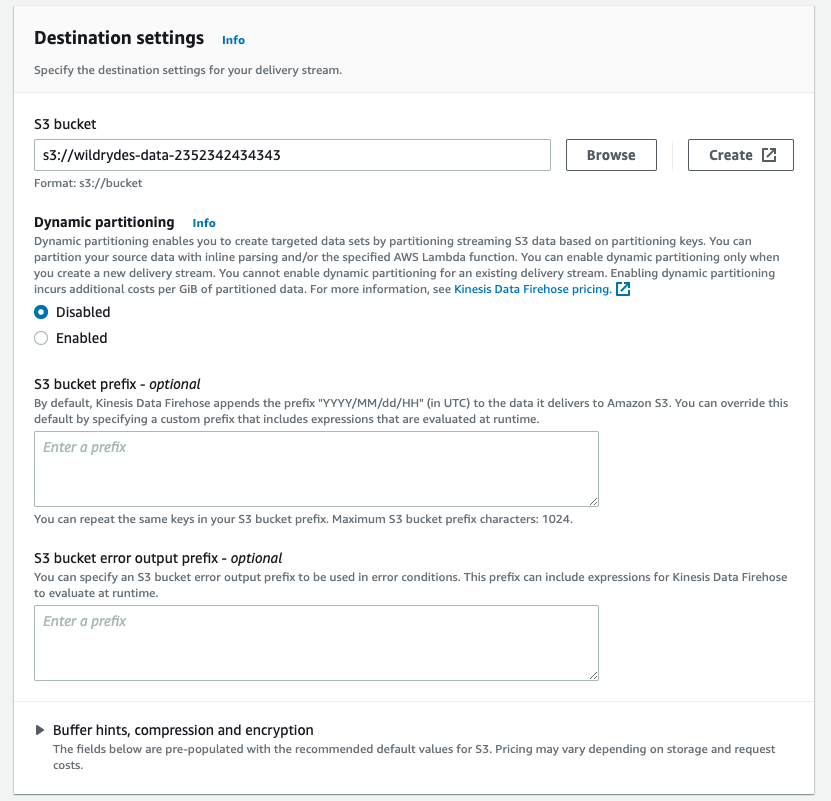
For Destination settings use Browse button to choose the S3 bucket you have created at the beginning of this module.
-
Click on Buffer hints, compression and encryption pane to reveal the settings. Change Buffer interval to 60 seconds.
-
Review the delivery stream details and click Create delivery stream.
4. Explore the batched data files
Using the AWS Management Console, navigate to the S3 bucket that you used as your Kinesis Data Firehose delivery target. Verify that Firehose is delivering batched data files to the bucket. Download one of the files and open it in a text editor to see the contents.
✅ Step-by-step Instructions
-
Click on Services then select S3 in the Storage section.
-
Enter the bucket name you create in the first section in the Search for buckets text input.
-
Click on the bucket name and navigate through the year, month, day, and hour folders to ensure that files are being populated in your bucket. If you don’t observe any directories, please make sure to start the producer script in the Cloud9 environment and to wait at least one minute. Refresh the S3 object view afterwards.
-
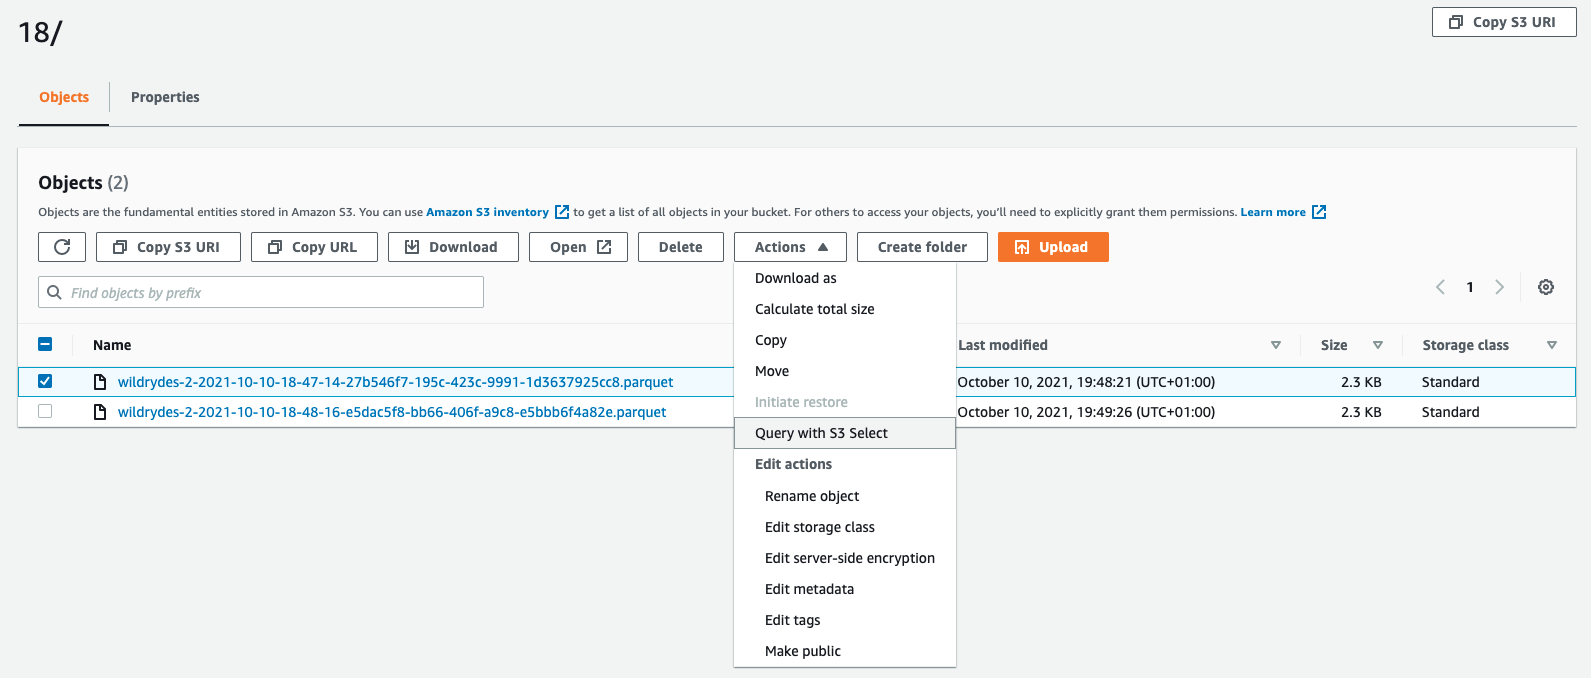
Click on one of the files.
-
From the Actions drop-down Menu, select Query with S3 Select
-
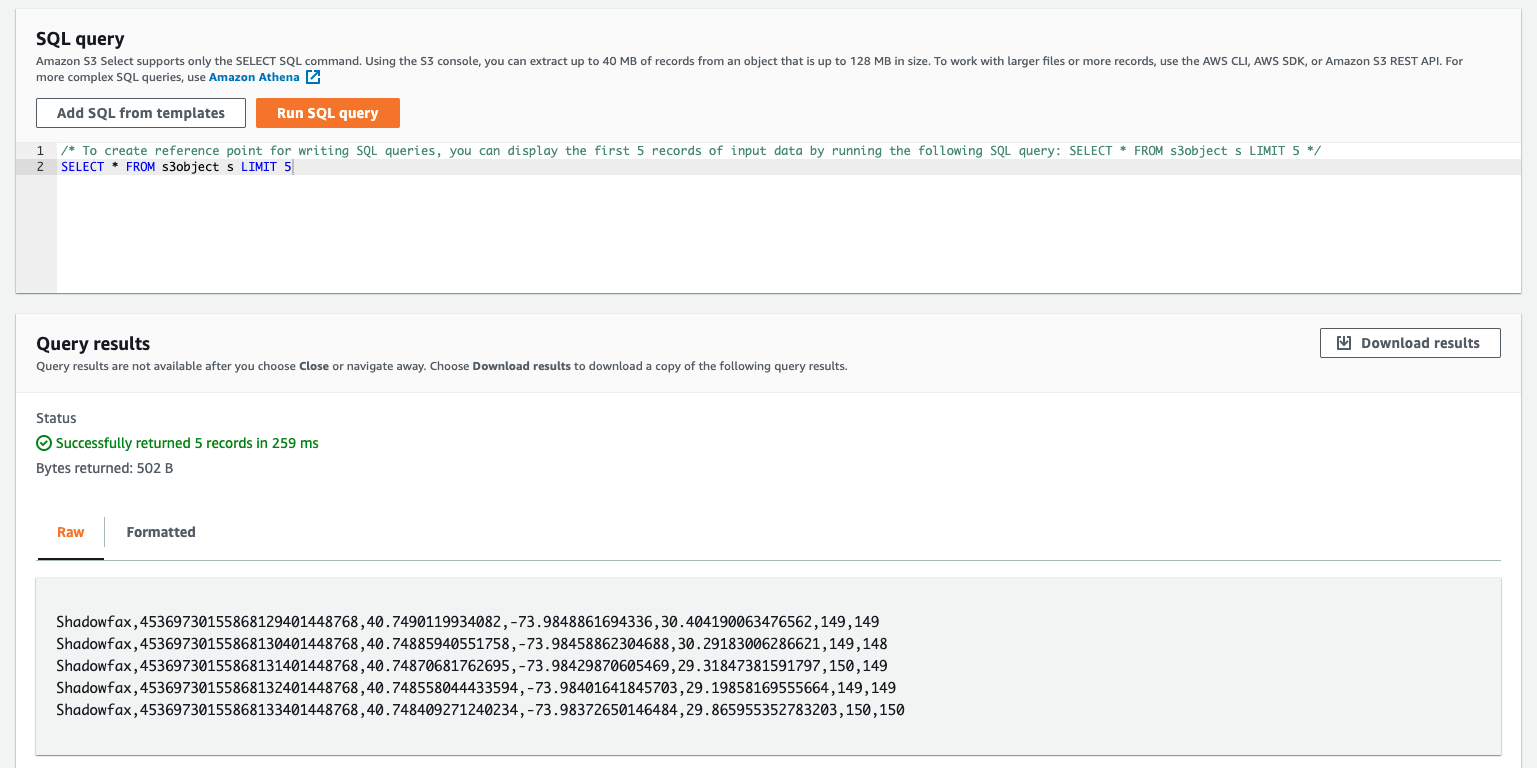
In the Input Settings, select
Apache Parquetfrom Format, and in the Output Settings, selectCSVandCommaas a delimiter.
-
Then click Run SQL query to preview the file content.
5. Use Amazon Athena to query the table
In this section you setup Amazon Athena table to query the raw data on Amazon S3 that has been automatically converted to Apache Parquet format to improve the query performance and reduce the costs.
✅ Step-by-step Instructions
-
Click on Services then select Athena in the Analytics section.
-
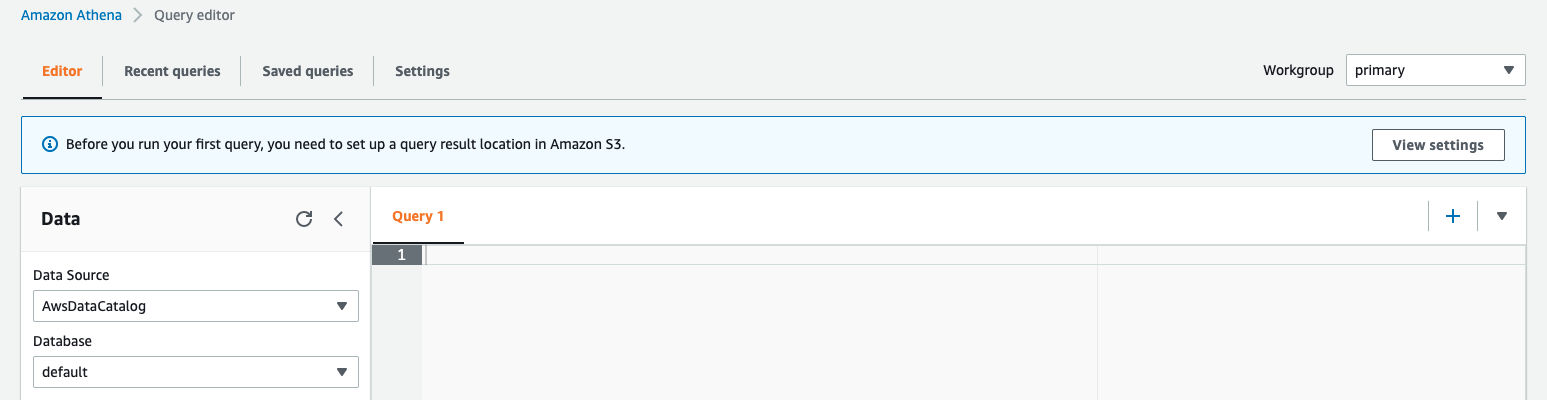
If prompted, click Explore the query editor

-
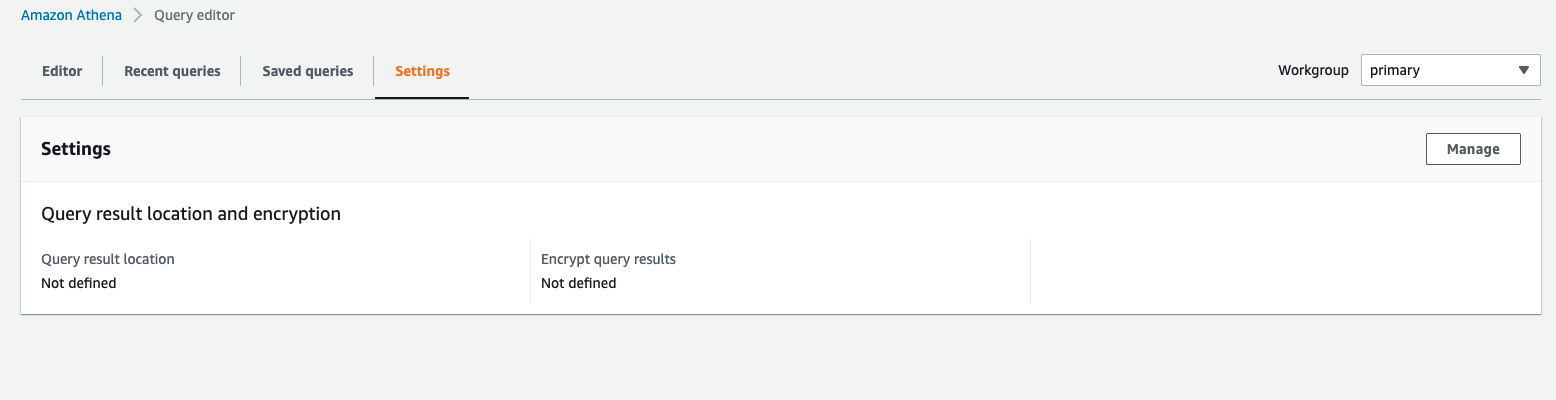
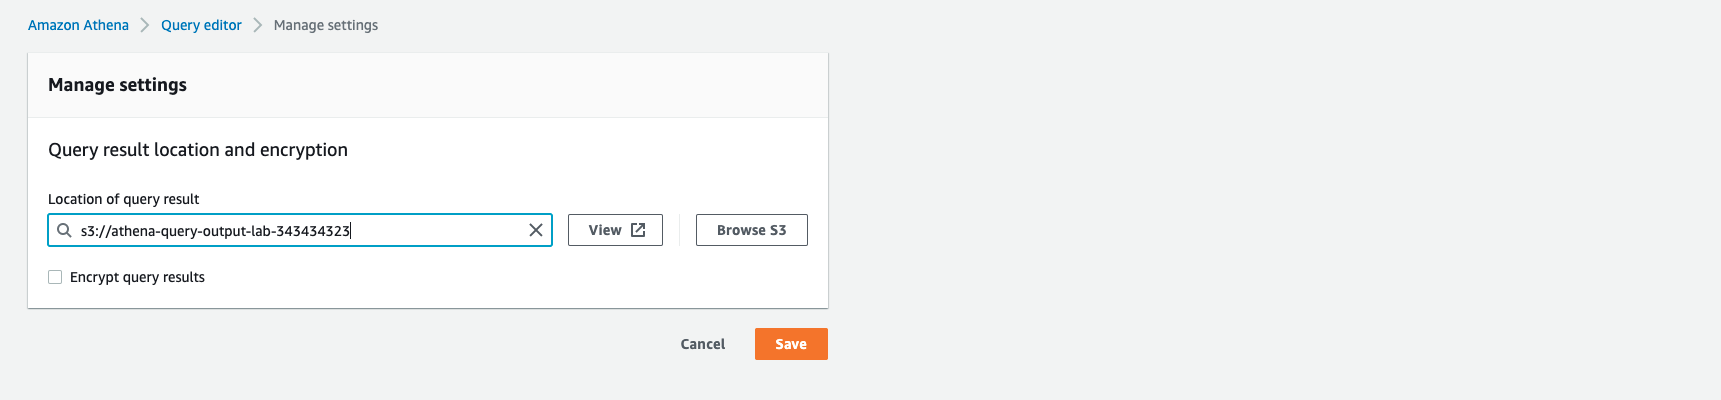
If this is the first time you use Athena in the specific Region, you will need to setup a S3 bucket as your query result location. This location must exist before you specify it in your workgroup settings. If this is the case you will need to create a S3 bucket.
-
In a new tab, click on Services then select S3 under Storage.
-
Click + Create bucket
-
Provide a globally unique name for your bucket such as
athena-query-output-<YOUR NAME>orathena-query-output-<ACCOUNT ID>and make sure you use the same AWS Region as the S3 bucket created earlier.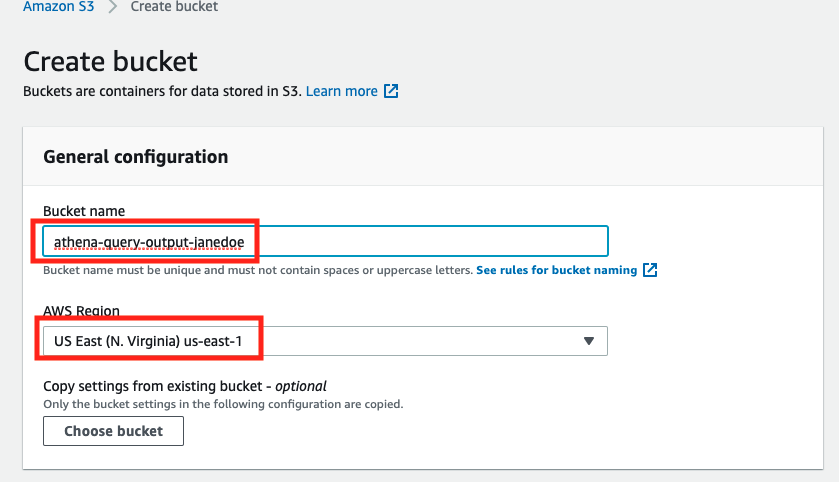
-
Click + Create bucket
-
Go back to Athena by clicking on Services then select Athena in the Analytics section.
-
Click the Settings tab, then click Manage button, choose the S3 bucket you have just created and then Save settings.
6. Query the data files
Query the Amazon Athena table to see all records that have been delivered via Kinesis Data Firehose to S3.
✅ Step-by-step Instructions
-
Click on Services then select Athena in the Analytics section.
-
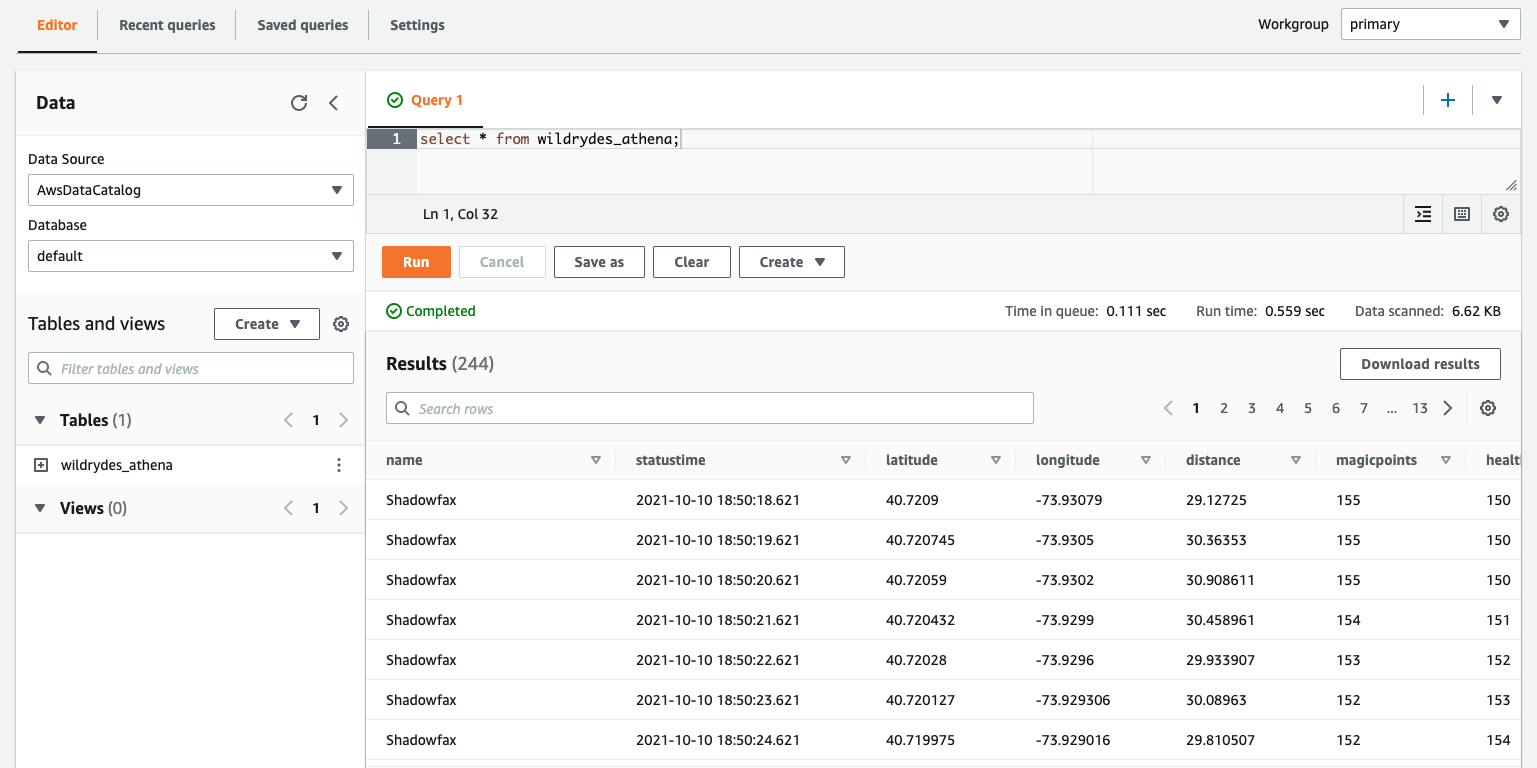
Navigate to the Query editor. Copy and paste the following SQL query:
SELECT * FROM wildrydes_athena -
Click Run.
⭐ Recap
🔑 Amazon Kinesis Data Firehose is a fully managed service for delivering real-time streaming data to destinations such as Amazon S3. Amazon Athena allows us to run ad-hoc queries against the raw data using standard SQL.
🔧 In this module, you’ve created a Kinesis Data Firehose delivery stream to deliver data from the Kinesis stream to an Amazon S3 bucket. Using Athena, you ran queries against this data on S3.
Next
🎉 You’re finished! You’ve completed the workshop. Thanks so much for participating! Please remember to give us feedback either in person, via GitHub, or through the survey mailed after an event so we can improve the materials.
✅ Have some time? Take a whack at some extra credit tasks.
✅ Be sure to clean up the resources from this workshop to ensure you do not incur any additional costs.